

Kirk’s Favorite Forages
When you learn everything that’s edible in the forest,
it’s really hard to starve to death.
Foraging for wild edibles on my family’s land has always been one of the highlights of having our own woodlands.
Throughout every season there is something we can pluck and pop in our mouths, which I’ve always found a novel way to relate to my forest. Over the years my kids have learned many of the native plants that are edible, and whenever I introduce a new one the inevitable question is “palatable or just edible”?
Though we routinely graze across the spectrum of trees, shrubs, groundcovers, and mycology in our forest, there are a few plants that comprise the staples of our annual foraging, and these we take home to process and/or store for future consumption. These plants include stinging nettle, Douglas-fir tips, and elderberries.
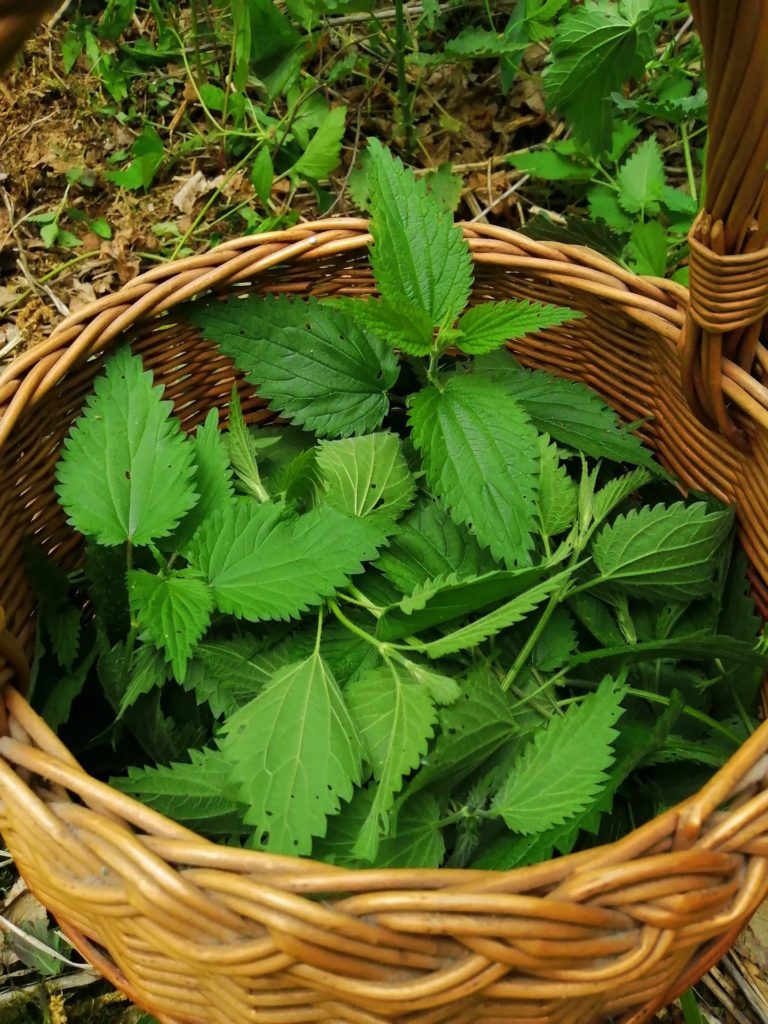
Stinging Nettle (Urtica dioica)
Most people relate to stinging nettle through its namesake – its sting. You won’t be left unawares for very long once you’ve walked into a nettle patch. Few people realize, however, that the irritating sting of the nettle can also have medicinal benefits, as, most notably, chemical compounds in the leaf’s hair have been shown to reduce pain and inflammation in sufferers of osteoarthritis.
The plant is known for many other medicinal values, which any quick search of its health benefits will reveal, and is highly nutritious. Stinging nettle’s leaves are a good source of calories, protein, fiber, and an array of healthy compounds that include vitamins A, C, and K; fatty acids; as well as minerals including iron, manganese, potassium, and calcium.
Stinging nettle is typically harvested in early spring when the plants are less than a foot or so tall. I just pinch the top whorl of leaves off, which retains the bulk of the plant and encourages it to produce more leaves. Rubber or leather gloves are recommended for this task as the underside of each leaf is covered in stinging hairs. I pick the leaves bare-handed as I tell myself the sting may help offset carpal tunnel resulting from lots of chainsaw use. Although I can show you a trick for eating the leaves fresh without getting stung, they are typically steamed, cooked, or blended in order to mitigate the effects of the sting and render them safe to eat.
My family’s favorite uses of stinging nettle include: tea, steamed with other vegetables, as a spinach alternative in lasagna, and as a basil alternative in pesto. You can readily find recipes for each online. Nettles have a very unique and strong flavor, so my pro tip if you’re processing them into pesto is to add plenty of salt, garlic, and more parmesan cheese than you’d think. I also substitute either almonds or walnuts for pine nuts as the former are much cheaper. However, nothing beats the taste of toasted pine nuts in pesto. Just sayin’.

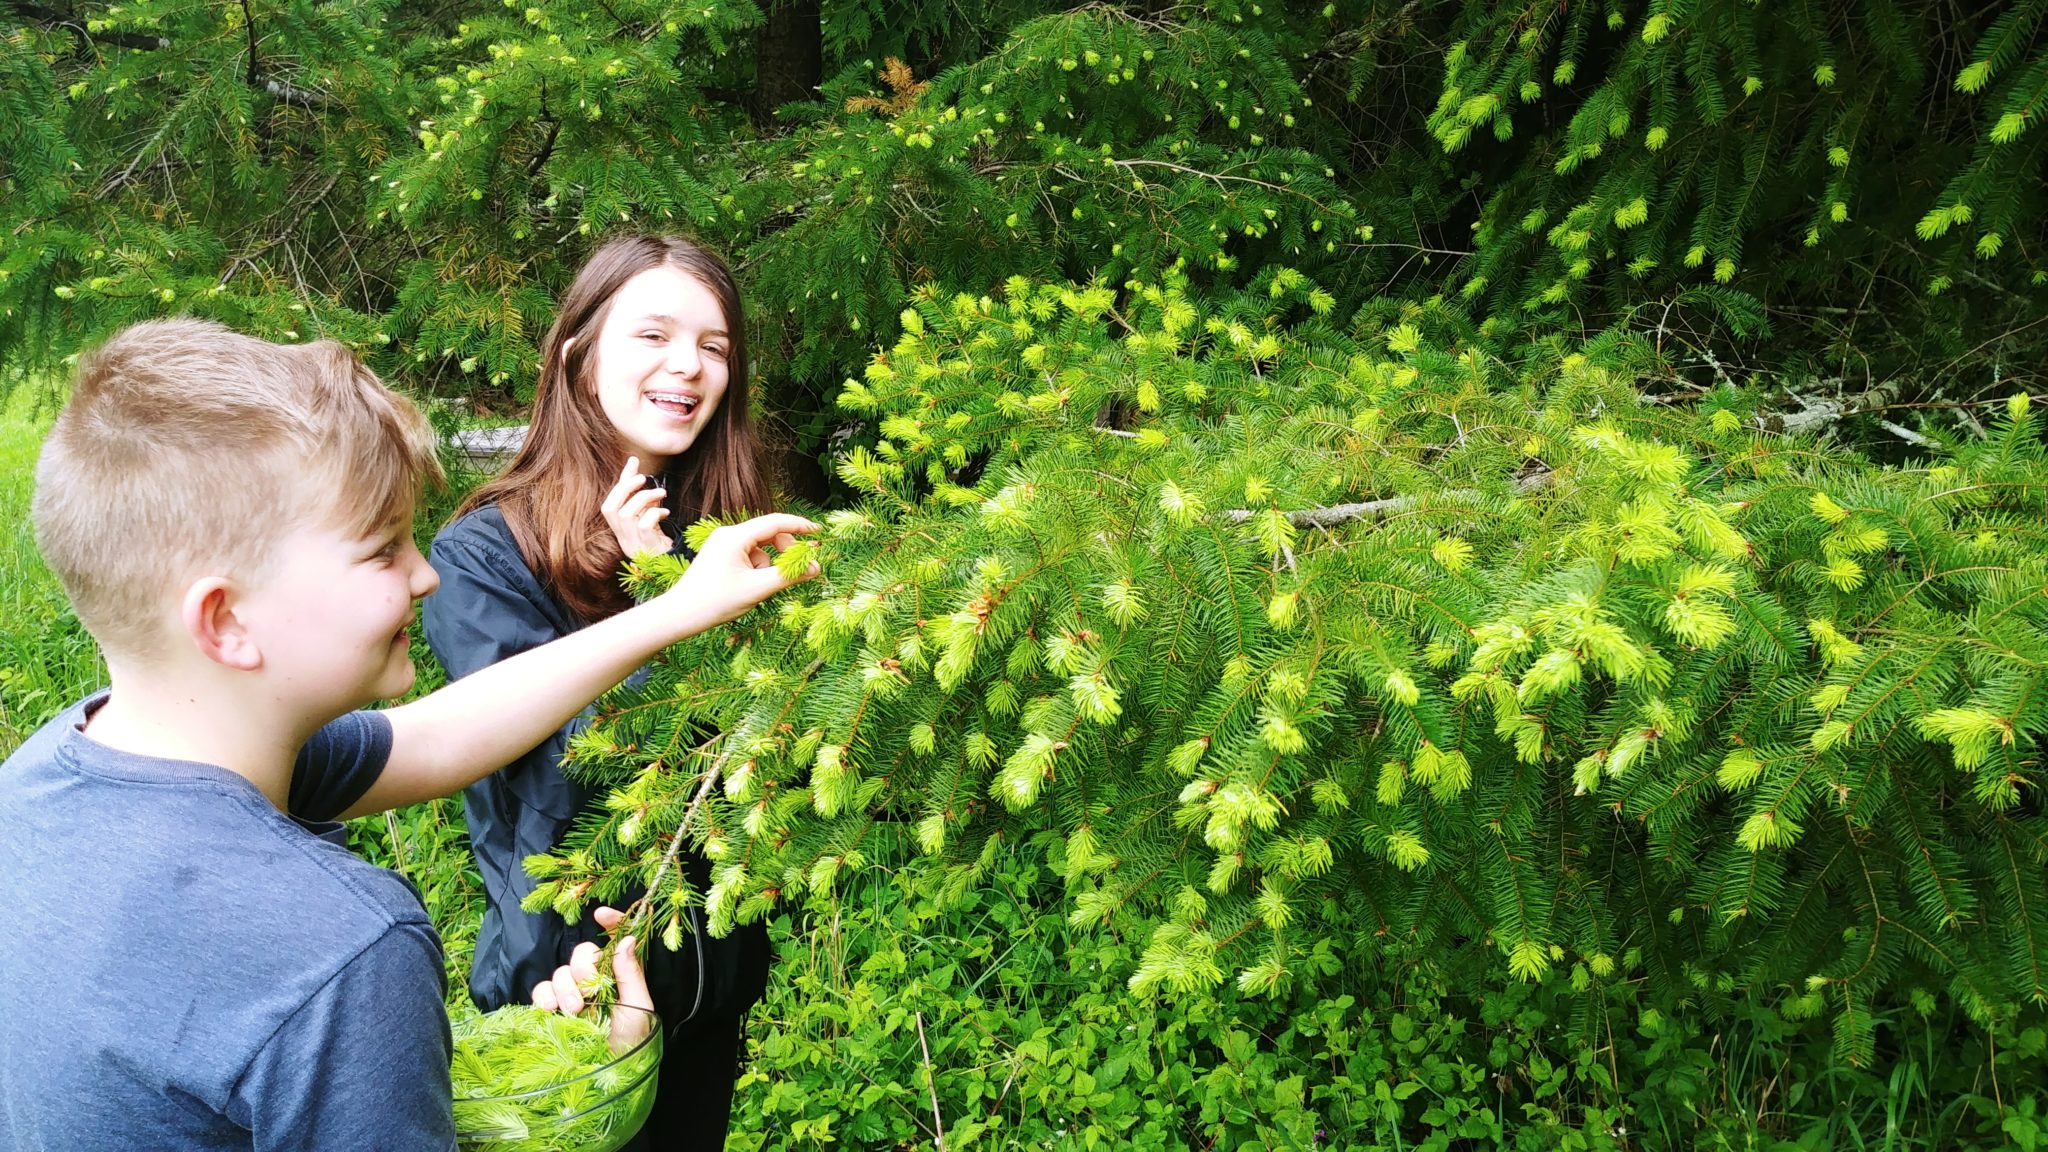
Douglas-fir tips (Pseudotsuga menziesii)
Sometime towards the middle or end of May the Douglas-fir on our land push out vibrant green and tender new needles from the tips of all of their branches. The bright and verdant color stands out in remarkable contrast to the dull, dark green of the older needles. When the needles are fresh and the most tender, I find them delicious to eat directly off the tree. Just a pinch between the finger and thumb, then either let them steep in my mouth, or mash them up with my teeth for a burst of citrusy-pine flavor. We also harvest an abundance of needles for making both fresh tea, and to dry for tea at a later date. Just a tablespoon of fresh or dry needles in a tea strainer is about right for a cup, or 2-3 tablespoons for a pot of tea. We have a dehydrator at home, which makes drying easy, but you can also use your oven at the lowest temperature.
Douglas-fir tips are a nice addition to foods like pesto, sauces or as a garnish to meats or salads or ice cream. Tips can be infused in vinegar or honey and used for flavoring syrups and liquors. Besides drying them for later use, you can also freeze them in a freezer bag. Although fresh needles are always best, before they develop more tannins and get tough and less aromatic, older needles can still be used for teas.
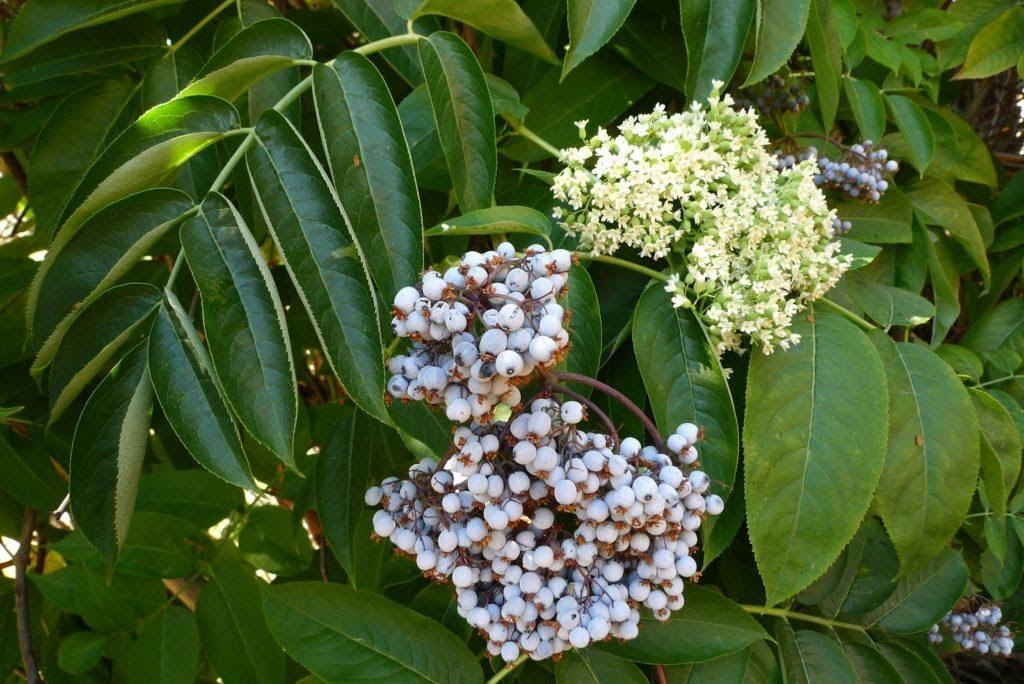
Blue Elderberry (Sambucus caerulea)
I’ve always admired blue elderberry for its stately, noble and upright form; that it’s often a loner in the woods; and for its vast, powdery-blue clumps of berries that are always a brilliant surprise when found.
They’re much rarer in Western Washington, so whenever I do come across one I always remark on it and pause for a moment to appreciate it (and note its location). I used to have a massive blue elderberry in our Oakville forest, but the closing canopy of our 26-year-old Douglas-fir have effectively shaded it out. I’ve planted numerous additional blue elderberry in a hedgerow along the edges of our forest, but they have yet to produce. So, in the meantime, admittedly, I harvest all my berries from a friend’s front yard in east Olympia. Pro tip: watch the berries carefully and harvest them as soon as they ripen. If you wait too long, the cedar wax wings will strip the bush in a day. No joke.
I process blue elderberries into a fall/winter medicinal syrup. Blue and black elderberry have been known for generations to improve the body’s immune system to help stave off colds and flus. Red elderberry have toxic compounds in them and should generally be avoided. I always keep a jar of elderberry syrup in our fridge, from early October to the end of April or so, and encourage my clan to each take a tablespoon per day.
After harvesting the clumps of berries, I’ve found that it’s much easier to separate the berries from the stem if I freeze the clumps in paper bags in our chest freezer for a day or two. Then the berries just fall right off with a shake or gentle raking with my fingers. Ideally you want to avoid having too stems parts in with your berries when you process them. To make my syrup I combine water with berries at a 2:1 ratio, bring them to a boil, then simmer for 30 minutes. Lately I’ve also added grated ginger and cinnamon, which really adds pizazz to the eventual syrup, as well as additional medicinal benefits.
Following simmering, I strain the berries through a sieve (or cheesecloth or wire mesh strainer), let cool for another 30 minutes, then add honey to the liquid at a 1:6 ratio. Most recipes call for extremely high ratios of honey to liquid. I just don’t need my syrup that sweet. Blue elderberry has a very pungent flavor that can be unappealing to some, so increasing the amount of honey, ginger, and/or cinnamon can help offset this. After the syrup has cooled further, I put it into 1 quart mason jars and simply freeze in my chest freezer.
For resources and recipes on food from the forest, visit these NNRG blog posts:
Leave a Reply